You are here
Installing DDWRT Router in VMWARE ESXi
Quick and Dirty
For the Impatient
- Create a VM with 2 NICS, 256MB of RAM and a 100MB IDE Hard Disk
- Boot off the CD mentioned below
- run cd /home && ./image-dd.sh
- Log in ddwrt via 192.168.1.1 Setup the WAN
- You may have to flop the NIC
Why
Sometimes I have found a need to build a virtual firewall to protect and isolate some test VMs. In the past I have used a Linux box and custom IP tables rules to achieve this, but I noticed performance was lacking.
Then I tried pfSense which is BSD not Linux and it works extremely well, and does a lot, but it is a resource hog and I the goal I had was to connect to virtual switches AND physcal switches on a Layer 2 network. I found my solution in ddwrt and Ethernet Over IP.
Yes I can achieve this via vlan tagging, but my original problem was getting my desktop with vmware workstation (my desktop) to a training network. Whatever my reasons, I found the small footprint firewall an intresting idea.
Setup
I will build a firewall VM on an ESXi 5.5 that has a private network, and a public network.
The public network is a DHCP enabled 203.0.113.0/24 network.
The private is an RFC1918 network 192.168.1.0/24 with a single Windows 7 VM for testing.
DDWRT box will obtain an IP address via DHCP on the public network and provide DHCP addresses on the private network.
Boot Disk
You will need to download the iso corelinux-ddwrt.iso it boots into a small linux version called Tiny Core and has dd-wrt_public_vga.image on it which you simply dd on to /dev/hda.
The iso is 25MB large and can be downloaded from http://www.apolonio.com/node/58
VM Creation
I will start with a typical VM Creation which I will edit prior to starting up.

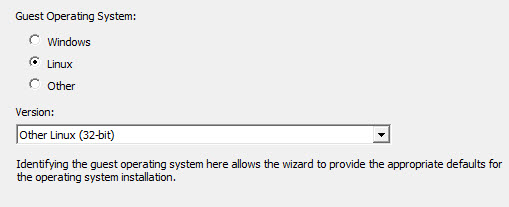 For the Guest Operating System it will be Other Linux (32-bit)
On VMware Workstation 9 I chose Other Linux 2.6.x kernel for the operating system.
We will create two NICs one for the private network, and one for the public network.

NOTE: There is some weirdness going on but when you first connect to the DDWRT NIC1 is the private network. But once you configure the WAN via Web Client you have to flip these two connections. NIC1 becomes public and NIC 2 becomes private.
During the initial build on an ESXi VM you cannot create an IDE disk, just go ahead and select the stock disk, because we will be creating a new 100Mb IDE disk.
Finish the vm creation wizard and edit VM. Remove the Hard disk
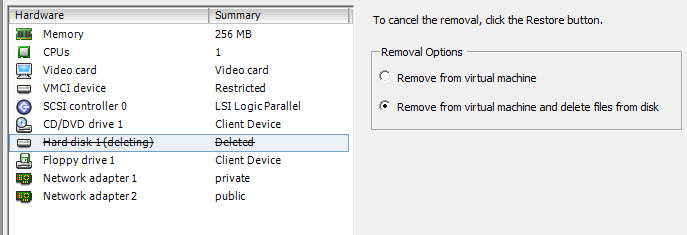
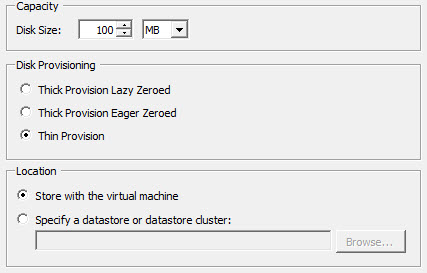 Add a 100Mb Disk
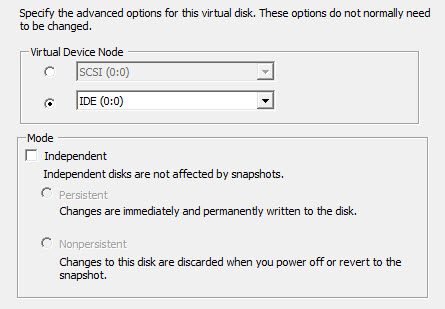 Add as an IDE disk
Here is how the VM Settings look like
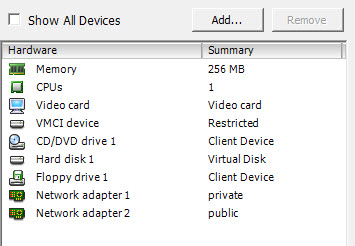
Now boot off of the cd mentioned above

The screenshot above is outdated, simply type in ./image-ddwrt.sh no need to cd /home
This will wipe out the ide disk, and reboot the VM into ddwrt.
Configure DD-WRT
Disconnect the Second NIC which is the public one and start up the VM
As mentioned above I do have a Windows box and I can use it to grab an IP address via DHCP and connect via web browser to 192.168.1.1
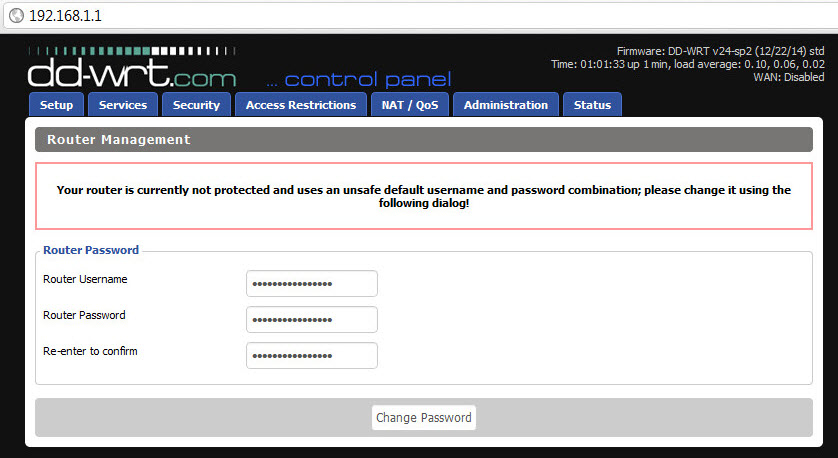 Create a username and password and log in.
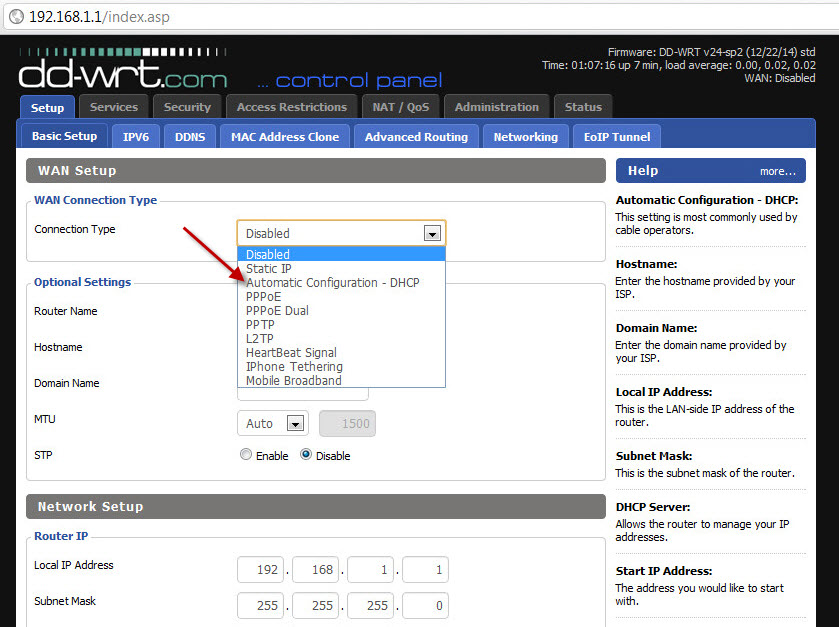
Go to Setup and setup your WAN Connection type, in this example it is DHCP
Save and Apply the settings
Network Gotcha
Sometimes the NICs flip and you have to go back into the DDWRT Settings and Flip the NIC Connections and connect the two Connections. I am still trying to identify why.
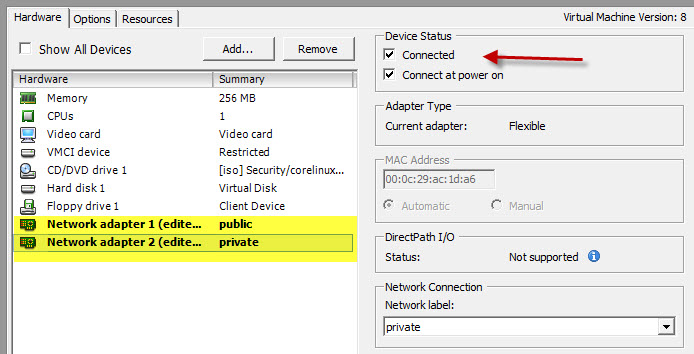
After you flip the NICs you may have to run arp -d 192.168.1.1 on your windows box to clear the arp entry.
Update: On the console I was able to set the mac using nvram set lan_hwaddr=00:0C:29:BLAHBLAH
nvram save and nvram commit
Some interesting other commands I used were
ip link set br0 down brctl delbr br0 brctl addbr br0 brctl addif br0 eth1 brctl show
Optional: After installation you can drop the memory on this box to 32Mb.
Theme by Danetsoft and Danang Probo Sayekti inspired by Maksimer
